How to use your Picosteady camera stabilizer
1- What you received
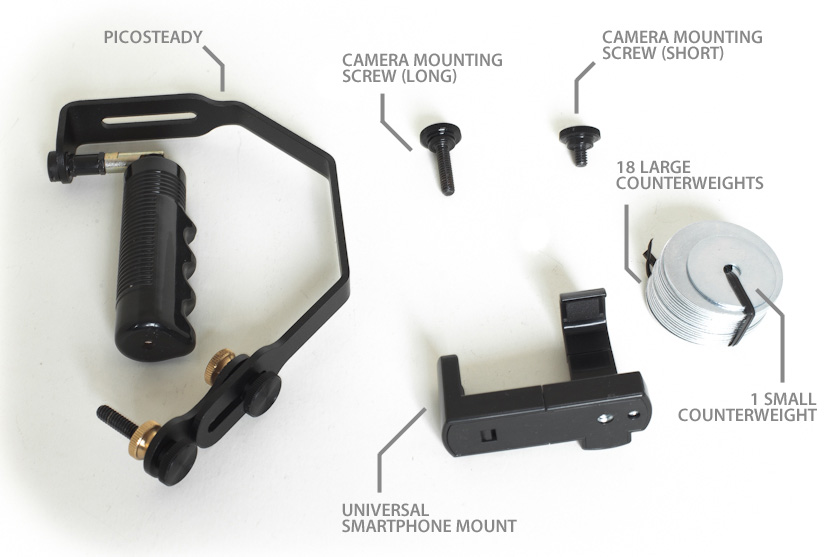
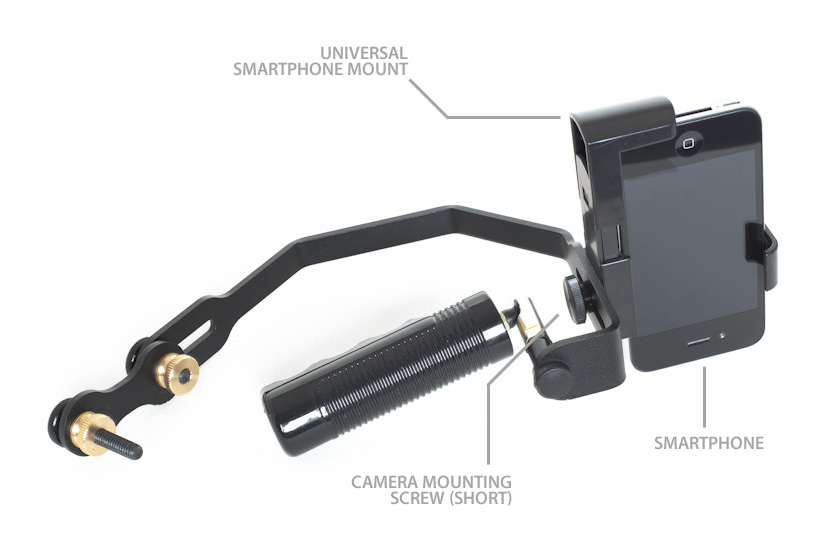
You should receive one Picosteady, one short camera mounting screw, one long camera mounting screw, 18 large counterweights, 1 small counterweight and one universal smartphone mount or one Glif iPhone mount (optional).
 2 - Mounting your camera on your Picosteady
- Attach your camera to the Picosteady using the short camera mounting screw.

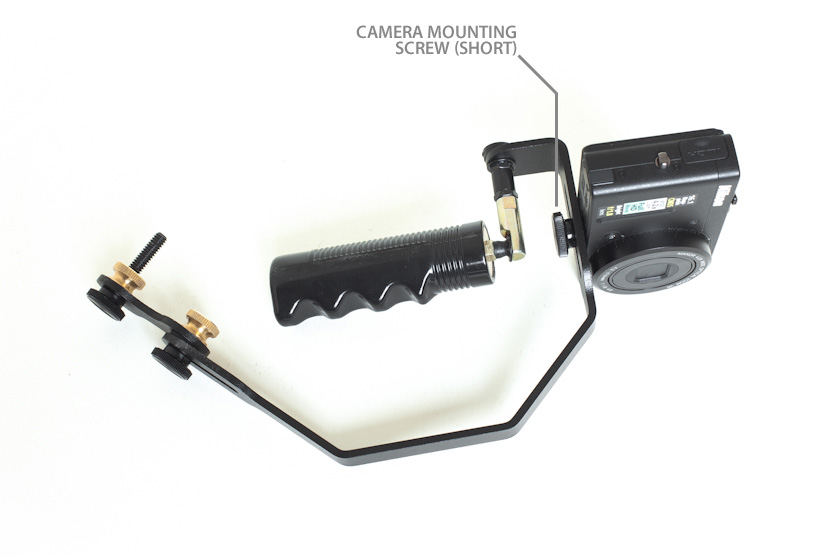
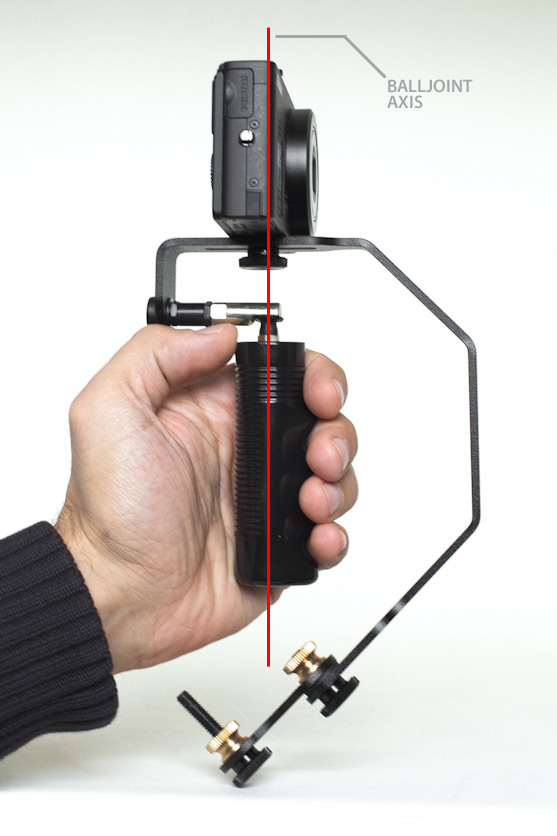
Try placing the center of gravity of the camera as close as possible to the balljoint axis by sliding the camera and screw in the camera slot.
If you are using a smartphone, install the smartphone mount (or Glif) with the short camera mounting screw and install your smartphone/iPhone securely in the smartphone mount or Glif with the camera facing forward. Do not overtighten but make sure the camera is secure.
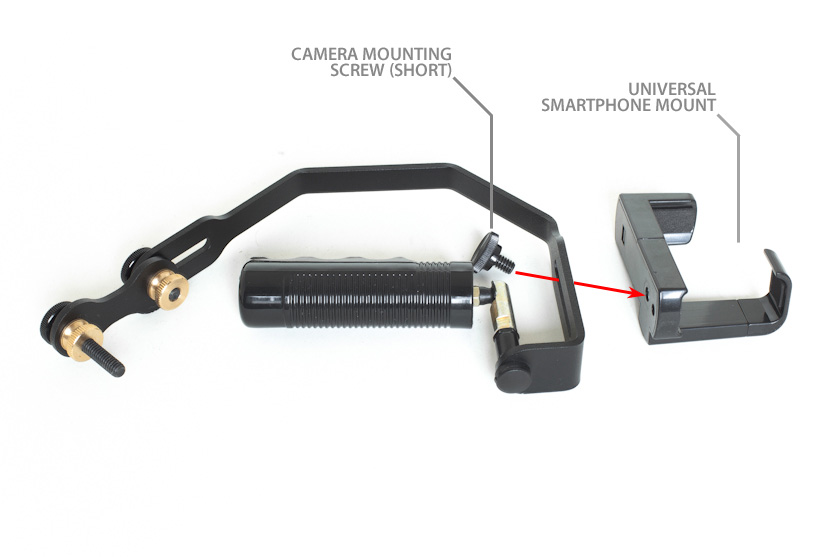
 Tip: be careful not to crossthread when inserting the mounting screw in the smartphone mount. If the fit is tight, go slowly and never overtighten. You can use a little bit of dishwashing soap to reduce the effort.
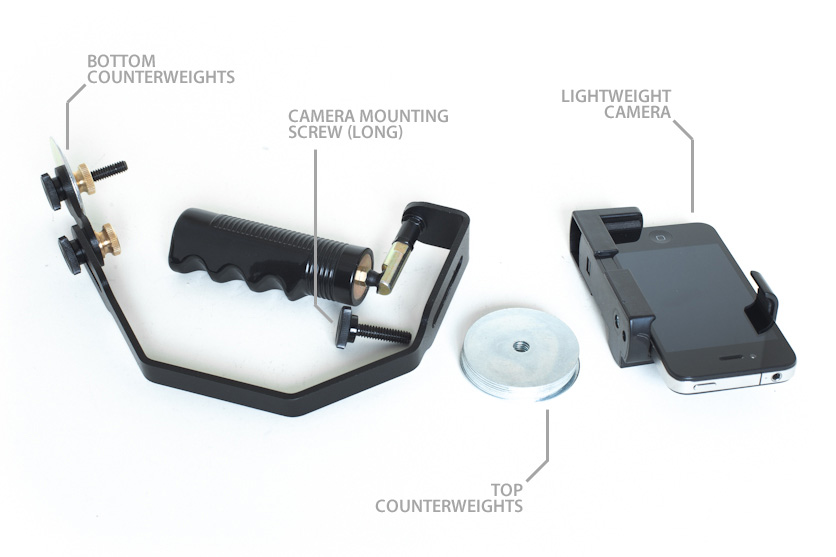
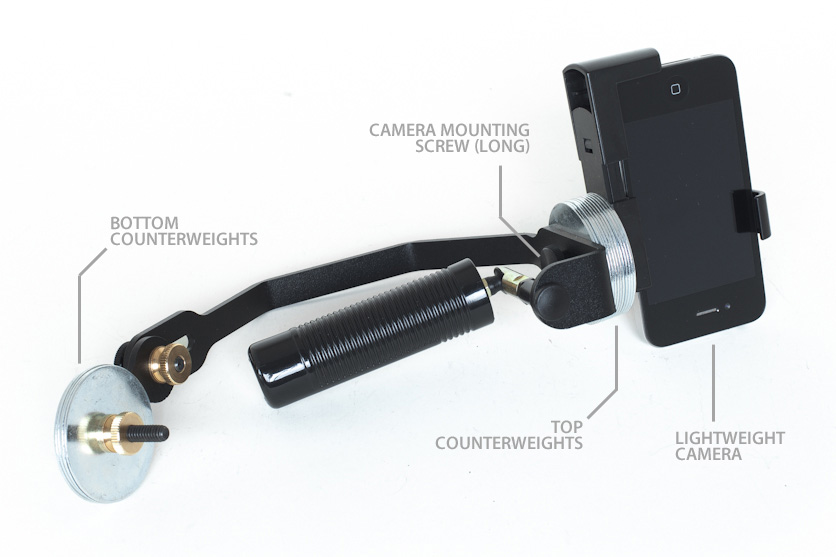
Tip: When using a very light camera such as a smartphone or a GoPro, you can use the long camera mounting screw instead of the short one to be able to add weight at the top of the picosteady. This will improve stability (see weight guide below)
Tip: be careful not to crossthread when inserting the mounting screw in the smartphone mount. If the fit is tight, go slowly and never overtighten. You can use a little bit of dishwashing soap to reduce the effort.
Tip: When using a very light camera such as a smartphone or a GoPro, you can use the long camera mounting screw instead of the short one to be able to add weight at the top of the picosteady. This will improve stability (see weight guide below)
 3 - Balancing your Picosteady
NOTE: We strongly recommend reading all of section 3 and 4 before balancing your Picosteady. The number of weights you add will depend on the setup you will require.
3 - Balancing your Picosteady
NOTE: We strongly recommend reading all of section 3 and 4 before balancing your Picosteady. The number of weights you add will depend on the setup you will require.
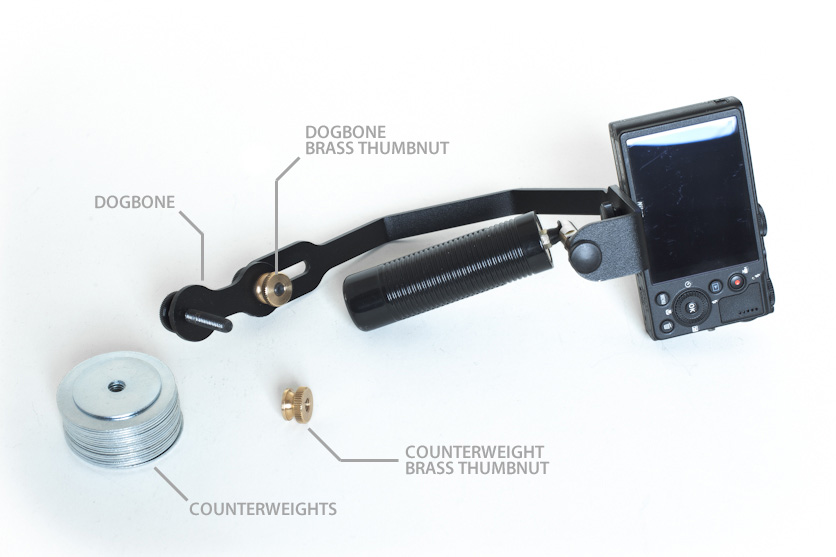
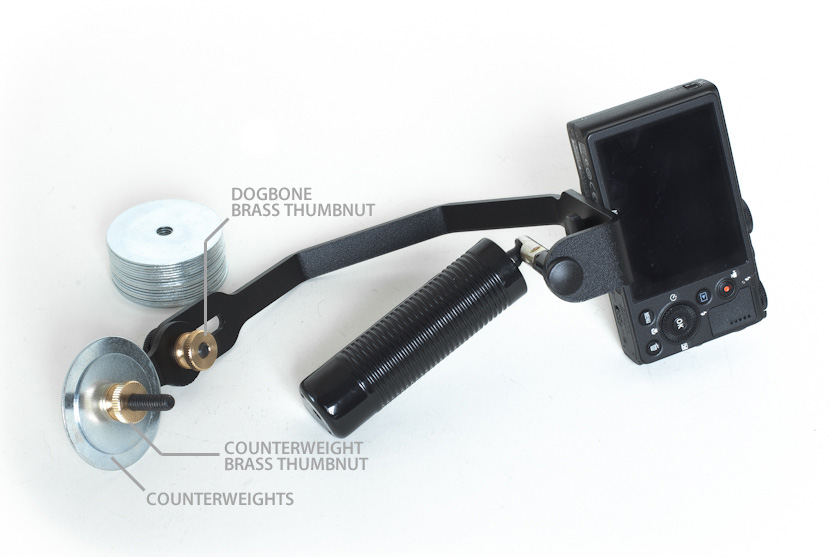
- Slightly undo the dogbone brass thumbnut and align the dogbone with the main axis of the picosteady. Tighten the dobgone thumbnut (do not overtighten)
- Undo the counterweight brass thumbnut, install the counterweights on the dogbone (see the weight guide below) and tighten the brass thumbnut
- Hold the picosteady and check for balance
Step A
If the Picosteady tilts all the way to the end of the balljoint travel in any direction, add counterweights at the dogbone until the camera is more or less upright. Once you are no longer at the end of the balljoint travel move on to step B.
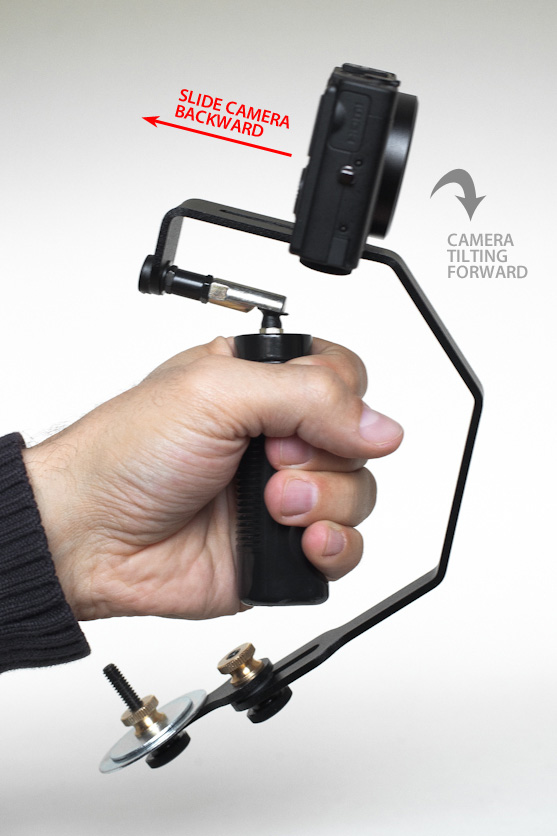
Step B
If the camera is tilting forward, slide the camera back in the camera slot and/or slide the dogbone up,
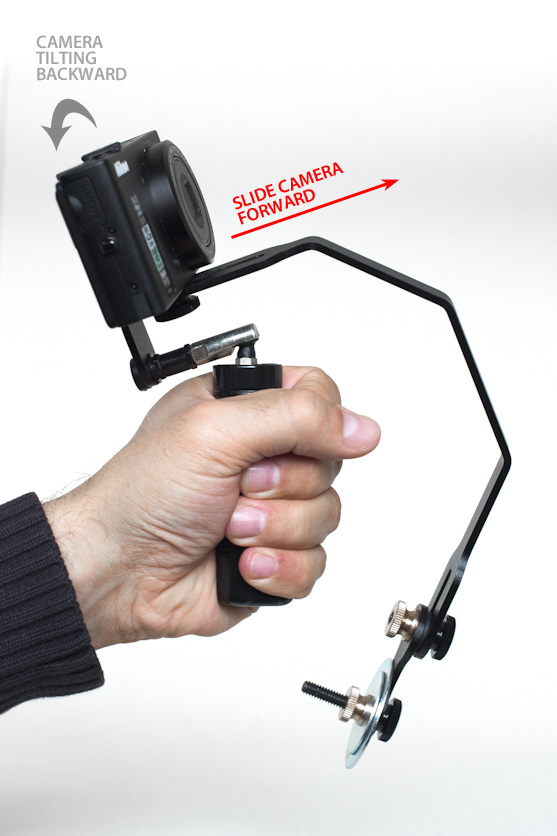
If the camera is tilting backward, slide the camera forward in the camera slot and/or slide the dogbone down.
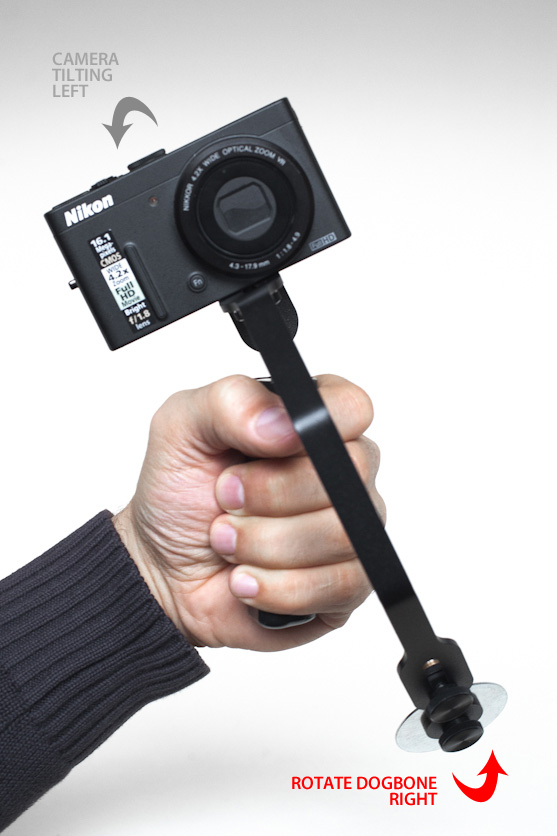
If the camera is tilting to the left, rotate the dogbone to the right.
If the camera is tilting to the right, rotate the dogbone to the left.
Always make one change at a time and always make small changes. If at any point, you end up at the end of the balljoint travel, go back to step A.
At this point the camera should be upright and steady. You are now ready to shoot. The Picosteady will eliminate all the small tilting and only transmit vertical (up and down) movement for smooth gliding shots that look natural.
4 - Dynamic balancing
As a rule of thumb, more weight will mean more stability but also more inertia. This means if the camera starts rocking, the pendulum effect will make it rock for longer until it settles back to steady. This type of setup is more suited for steady continuous shots with little or no changes in speed and direction.
Less weight means the camera will be a little bit less stable but will also have less inertia. This means it will start rocking more easily but will also settle back faster. This is more suited for faster moving shots with different speeds and directions.
We recommend experimenting with different setups to see what works best for your type of shot. It is generally easier to start with a little bit more weight and to remove counterweights as you adjust for the setup you are trying to achieve.
5 - Weight Guide
| Camera | Camera Mount Weight | Dogbone Weight |
| iPhone 4/4s | None | 1 large 1 small |
iPhone 4/4s
(heavy setup) | 13 large | 5 large |
| T2i 18-55mm | None | 18 large 1 small |
| Nikon P300 | None | 1 large 1 small |
Nikon P300
(heavy setup) | 13 large | 5 large |
| GoPro HD | None | 2 large |
GoPro HD
(Heavy setup) | 12 large 1 small | 6 large |
| Canon G12 | None | 5 large |
| Nikon P7100 | None | 5 large |
* The number of counterweights in the table above are starting points only. You will need to go through the balancing procedure above to make sure your Picosteady is balanced for your exact setup.
NOTE: You will not be able to balance cameras heavier than approximately 750 g / 1.7 lbs.
6 - Tips and Tricks
- When shooting with your picosteady, hold the assembly so that the camera is at eye level at a distance of approximately 12-18 inches from your face. Use smooth natural movements and avoid abrupt changes in speed and direction.
- We recommend keeping your knees slightly flexed while walking to transmit as little movement as possible to the camera.
- Comfortable shoes with rubber soles help reduce movement too.
- Always be aware of your surroundings and watch where you are stepping.
- If you use very light cameras, you may want to remove the rubber dust shield off the ball joint by cutting it off carefully with scissors or a cutter. This will make the movement even more fluid.